
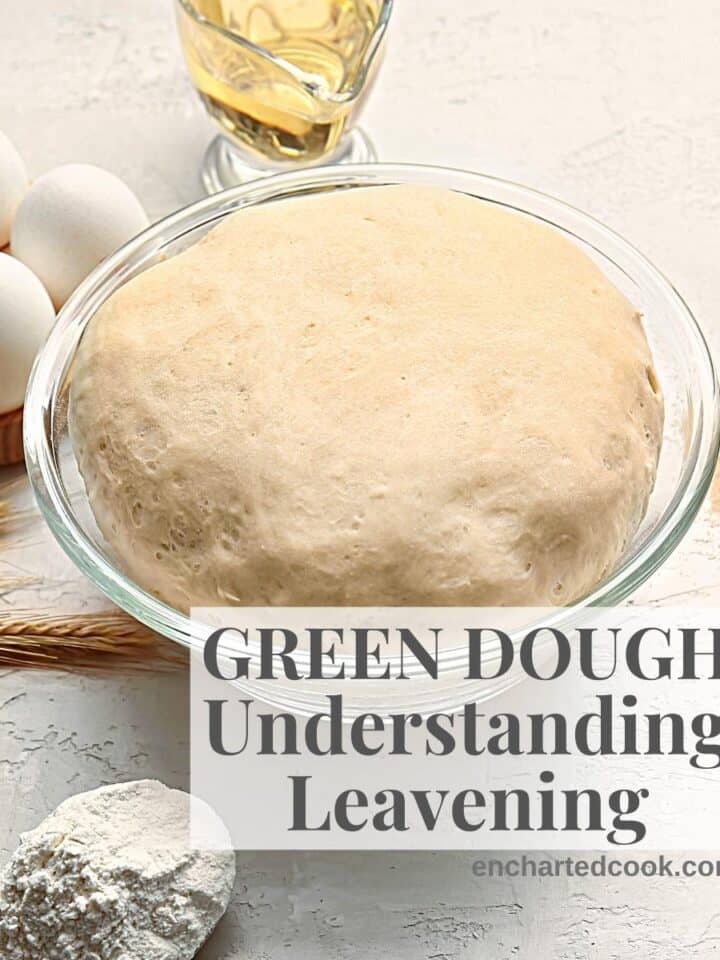
My homemade White Sandwich Bread has just 7 ingredients and is better than any store-bought bread. This is an easy step-by-step bread recipe!
This easy bread recipe makes a single loaf of white sandwich bread that is soft and buttery in flavor with a slightly chewy crust. Hands down, this is my absolute favorite bread to make.

I love making my own bread. Of the things I bake, baking bread makes my house feel like home. As the bread rises and is baked, a yeasty sweet aroma wafts through the whole house, filling every room with comfort, happiness, and anticipation.
Jump to:
- Is Making Homemade White Sandwich Bread Hard?
- Ingredient Notes
- How to Proof the Yeast
- How to Make White Sandwich Bread
- 6 Easy Steps to Make Homemade White Sandwich Bread From Scratch
- My Top Tips
- Troubleshooting
- Uses for Homemade White Sandwich Bread
- Storage
- More Bread Recipes and Posts You'll Love
- 📖 Recipe
- 💬 Comments
Is Making Homemade White Sandwich Bread Hard?
Making bread is not hard. It simply requires the right ingredients and a few simple steps. But… I think I know what you are thinking. You are thinking… you can't make bread. But, you can! Seriously!
If you've never made your own yeast bread before, I bet you haven't because you think you don't have time, or that the process is complicated, or kneading seems difficult. Let's talk about each of these reasons:
Time…
You might be thinking… you don't have time to make bread. It's true. It does take time to make good bread. But the time is in waiting for a rise, and other things can be done while waiting for the risings to complete.
Making Bread is Not Complicated
If you haven't tried making bread before, don't be afraid! Bread making does not have to be complicated and this recipe is great for beginners. In short, the six basic steps are:
- Proof the Yeast.
- Mix the Dough.
- Let the Dough Fully Rise.
- Shape the Loaf.
- Let the Shaped Loaf Rise.
- Bake!
Use a Stand Mixer to Knead
Hmmm… yes, kneading is work and can be hard. But in this recipe, there is no extensive kneading by hand and no need to perform a windowpane test to see if the gluten has developed in the dough.
Instead of kneading the dough by hand, you beat the dough with an electric mixer for 5 minutes to develop the gluten and structure of the dough.
So, you see? This homemade white sandwich bread is super easy!
So, let's bake!
Ingredient Notes
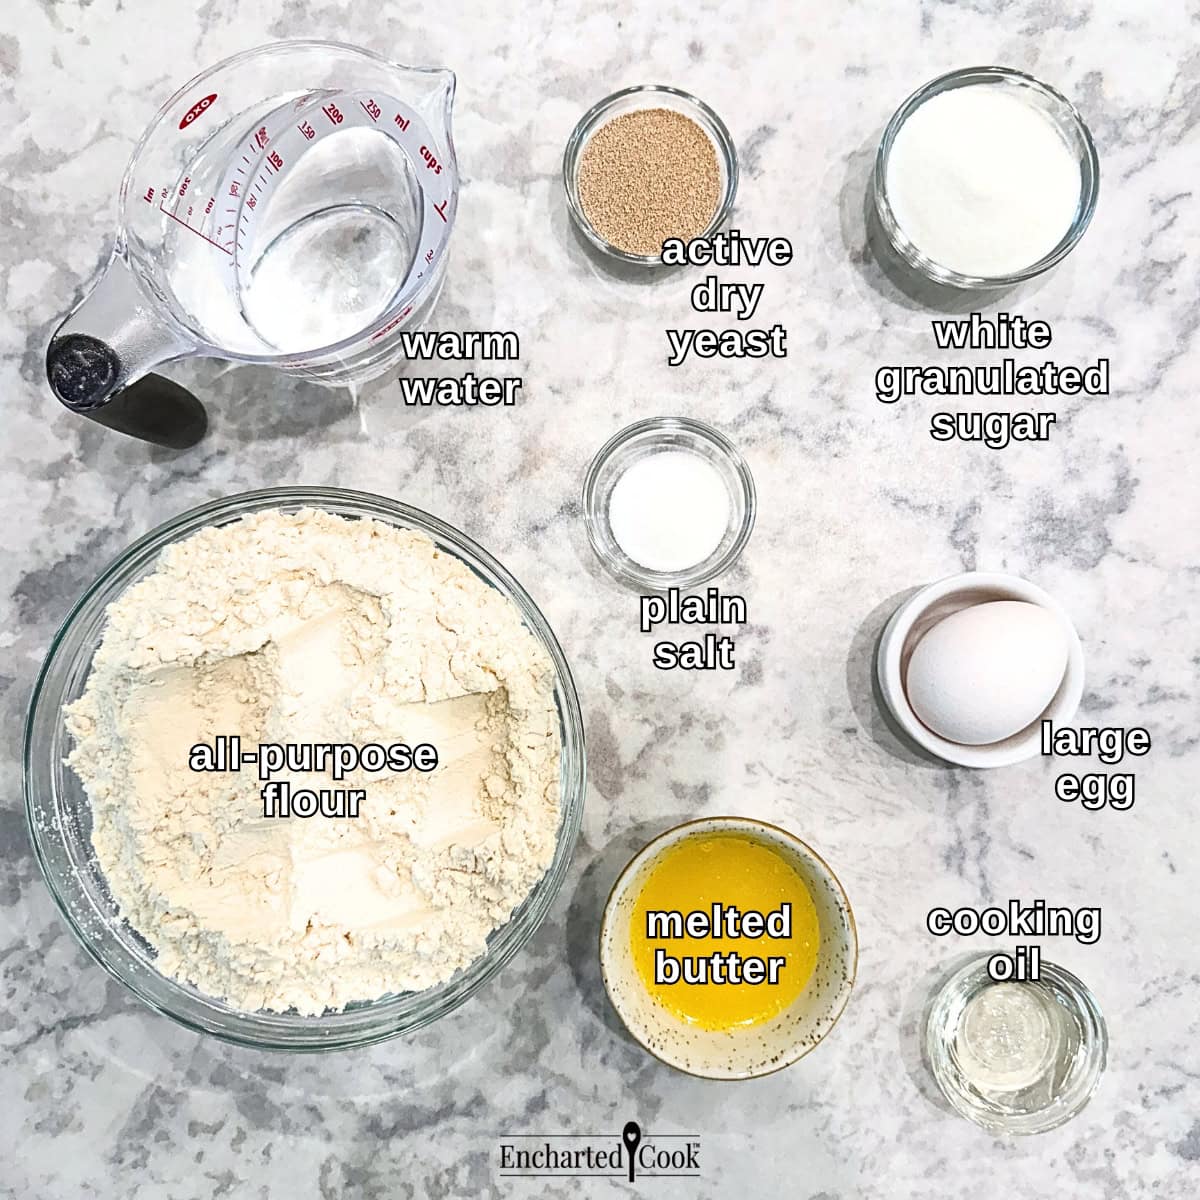
This simple homemade white sandwich bread dough contains just 7 ingredients:
- Water - Yeast needs a moist environment to grow and thrive and just plain warm water is all that is needed. Do not substitute milk or milk substitutes as these will make a bread that is too soft.
- Active Dry Yeast - Any brand will work and it doesn't matter if it "Bread Machine" or "Active Dry". I prefer to purchase yeast in a jar as it is more economical than the packets. Also, please note if you prefer to buy a small amount of yeast, a single packet is not enough for this recipe. You will need at least two and you will need to measure the amount of yeast.
- White Granulated Sugar - White granulated sugar will give the yeast a nice meal to eat to get it growing quickly.
- All-Purpose White Flour - All-purpose flour makes an excellent bread and is the flour that is most commonly on hand. For this recipe, I don't recommend substituting bread flour.
- Melted Butter - Butter adds a rich buttery flavor and makes the bread tender. You can use melted butter that has cooled or very soft, room temperature butter.
- Large Egg - A whole beaten egg will add additional protein structure to the bread, which makes the bread chewy but not heavy. Plus the natural fats in the yolk will soften the texture of the bread.
- Salt - Adding salt is all about adding and enhancing flavor. If you omit the salt, the bread will not have a good flavor.
Optional:
- Cooking Oil - A small amount of cooking oil will make it easier to turn the dough out of the bowl that it is raised in. You don't have to use any oil, but it does make it easier to handle the raised dough.
Please see the recipe card for the quantities.

Here I'm showing you the ingredients the way they are when I'm making this dough. Because let's be honest and real. When you are cooking at home, your work counter will more likely look this.
The water, yeast, and sugar are in the stand mixer bowl to proof and I've measured the salt, partially melted the butter and let it cool, and beaten the egg so they are each ready to use. The flour is in its storage container and the measuring cup is ready to scoop and fluff the flour for measuring.
How to Proof the Yeast
The most important step in making bread is proofing the yeast. "Proofing" means to prove your yeast is able to divide and grow and begins by activating the yeast in warm water. I always give the yeast something nice to eat like white granulated sugar and let the yeast fully activate and grow before mixing my dough.
The best water temperature for proofing active dry yeast is between 105° and 110°F. If you don't have a thermometer to test the temperature of the water, you can perform the "wrist test". A drizzle of warm water across the wrist should feel warm and comfortable.
Here you can see the progress of the activation of the yeast. I started by putting warm water in my mixing bowl. I added the yeast and then the sugar. I always prefer to add the sugar last. The heaviness of the sugar helps submerge the yeast and makes everything mix together easier.

At 5 minutes you can see the yeast mixture has become frothy but has not risen.

After 20 minutes the mixture's foamy top has risen well and the surface has a spongy look.
When the yeast is fully activated, you can be assured that your bread will rise very well. Please note there will be some liquid at the bottom of the bowl of the activated yeast.
How to Make White Sandwich Bread
6 Easy Steps to Make Homemade White Sandwich Bread From Scratch
Here is a quick overview of the 6 easy steps to make your own sandwich bread.
- Proof the yeast.
- Mix the dough.
- Let the dough rise.
- Shape the loaf.
- Let the loaf rise.
- Bake the bread.
Now, let's look at these steps in detail:
Proof the Yeast

Step 1 - Put warm water, dry active yeast, and granulated sugar into a large bowl of a stand mixer. Stir well and let the yeast fully proof for 20 minutes.
Mix the Dough


Step 2 - Add all-purpose flour, softened butter, beaten egg, and salt.
Using a dough hook, mix the dough at the lowest speed for about 1 minute. This moistens all of the ingredients and keeps the flour from flying out of the bowl. Turn the speed up to medium and beat the dough for 5 minutes.
Beating the dough takes the place of kneading. As the dough is beaten, you will see the dough tighten and relax, moving up the dough hook and then gathering into a ball. This is normal and will happen several times as you beat the dough.
Let the Dough Rise


Step 3 - Use a silicone spatula to remove the dough from the dough hook. Gather the dough into a ball and place the dough into a large oiled mixing bowl. After placing the ball of dough in the bowl, turn the dough over to place the oiled side up in the bowl.
Cover the bowl with cling wrap and allow the dough to rise for 2 hours or until 4 times in size.
Shape the Loaf


Step 4 - Tip dough out of the bowl and onto a lightly floured work surface. Gently stretch, pat, and shape the dough into a long rectangle. The narrow end of the rectangle should be the same length as your baking pan.
Tightly roll the dough into the shape of a log. Place the dough seam side down in a greased loaf pan.
Let the Loaf Rise


Step 5 - Let the shaped loaf rise for 1 hour, or until it is fully risen above the top of the pan.
Bake the Bread

Step 6 - Bake the bread. The bread is done when it is golden brown. Let the bread cool in the pan on a wire rack
Now the whole house will be filled with the delicious, sweet aroma of fresh bread baking. You will love it! It is absolutely better than any candle or room freshener!
Wait for the bread to fully cool in the pan. When cool, the loaf easily slips from the tipped pan.
My Top Tips
♡ Use the scoop and sweep method to measure the flour. I have found that this method gives good consistent results without having to use a scale and weigh the flour.
The way I do the scoop and sweep is I dip my measuring cup into the container of flour and empty it out back into the container. I do this 3 times. On the fourth scoop, I overfill the measuring cup and then level the flour in the cup by drawing a knife across the top of the measuring cup.
The purpose of repeatedly scooping flour before measuring it is to aerate the flour. This aids in producing cups of flour that are similar in weight each time you measure.
If you use the same method to measure your flour every time you make this bread, you will have more consistent results.
♡ The butter can be softened or melted. Measure the butter, then let it come to room temperature to make it soft, or partially melt it in the microwave and let it cool.
♡ For the very best texture, do not overwork the bread dough. Handling the dough as little as possible will produce a tender loaf of bread. Overworking the dough will result in bread that is "tough" and not as pleasing.
♡ A plastic shower cap makes a great cover for your bowl while the dough is rising. It is washable and reusable and a great replacement for cling wrap. I learned this specific tip from watching the amazing baker, John Kirkman, on YouTube.

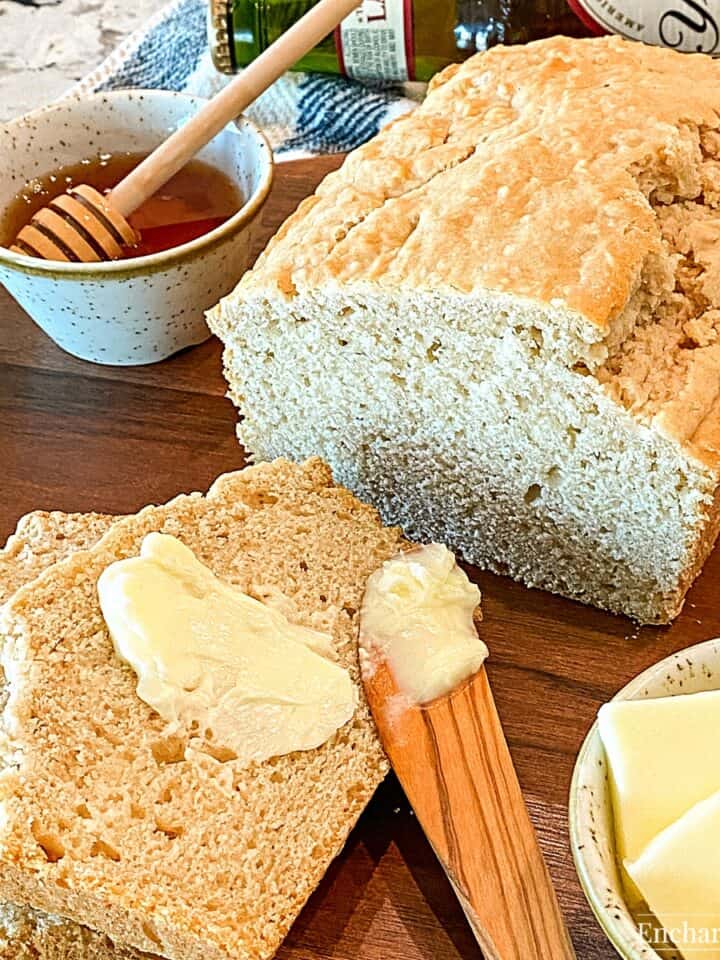
Doesn't it look lovely on just a plain cutting board?... and wasn't that easy?
Troubleshooting
- The Dough is Soupy: Some of my readers have reported "soupy" or very wet dough. Make sure you only use 1 cup of lukewarm water when proofing the yeast and do not add more water when mixing the dough.
- The Bread Did Not Rise: Make sure your yeast is not past it's "best by date" and be sure to use a full tablespoon of yeast. A tablespoon is 3 teaspoons and a packet of yeast is only 2 ½ teaspoons.
- The Dough is Stiff or Hard to Shape: Too much flour in the dough will make it tight and stiff. You can add a tablespoon of water to loosen it.
Uses for Homemade White Sandwich Bread
Homemade bread can elevate any meal to something special, and can also be used to make:
- Sandwiches
- Buttered Toast
- Avocado Toast
- French Toast
- Cinnamon Toast
- Bread Puddings
- Bread Salads
- Croutons
- and many other dishes!
I generally cut a few slices for dinner on the day I make it. Then, I wrap it tightly in plastic wrap and it stays fresh and delicious for about 10 days, even without refrigeration.
My favorite way to enjoy this bread is to have a slice with nothing on it. Sometimes, I cut a slice and eat it by tearing small pieces from the slice. It is so rich and delicious!
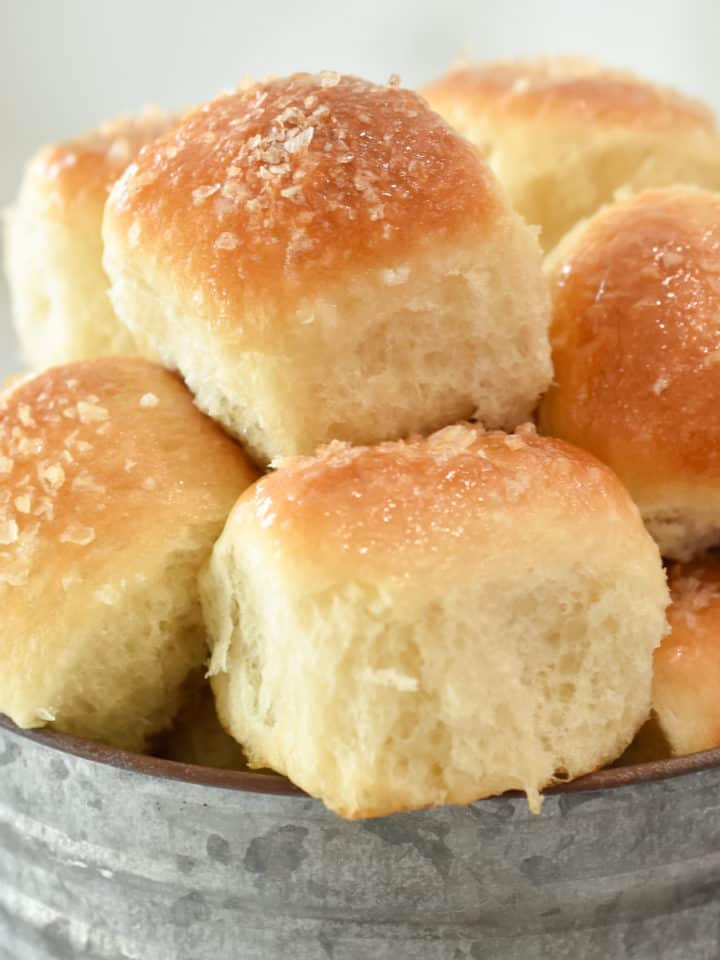
Once you've learned the basics of making a simple bread with this recipe you can also make my Garlic Parmesan Bread Knots, Garlic Parmesan Hamburger Buns, or Steakhouse Dinner Rolls. Each of these recipes uses very similar ingredients and the same method for mixing and raising the dough.
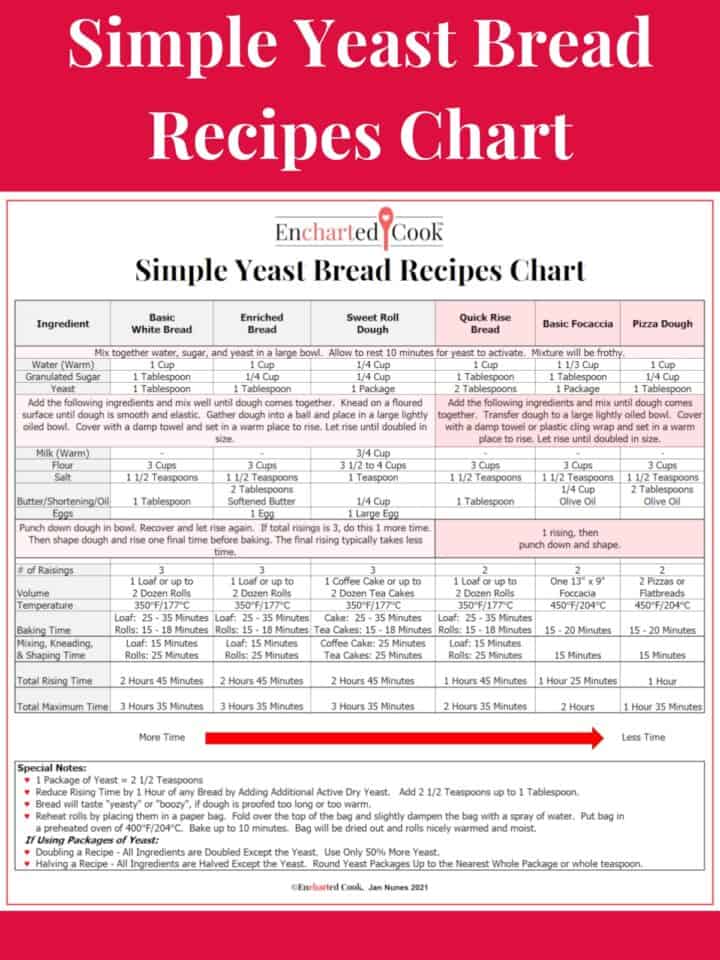
If you would like to learn more about how bread recipes differ and compare several bread recipes on one chart then please check out my Simple Yeast Bread Recipes Chart which has recipes for Basic Bread, Enriched Bread, Sweet Roll Dough, Quick Rise Bread, Basic Focaccia, and Pizza Dough.
Storage
This bread will stay fresh for up to 10 days at room temperature, if stored wrapped in plastic wrap.
I prefer to not slice the loaf until I need a slice. To me, the bread stays moist and fresher if I just wrap it in plastic wrap and cut what I need when I need it.


♡ Did you love this White Sandwich Bread? Please leave a 🌟 star rating and let me know how things went in the ✍ comments below. Thanks for visiting!
📖 Recipe

White Sandwich Bread
Want to save this recipe?
Ingredients
- 1 Cup Lukewarm Water
- 1 Tablespoon Active Dry Yeast
- ¼ Cup Granulated White Sugar
- 3 Cups All-Purpose Flour
- 1 ½ Teaspoons Salt
- 2 Tablespoons Butter, Softened or Melted and Cooled
- 1 Large Egg, Slightly Beaten
- 1 Tablespoon Vegetable Oil
Instructions
- Proof the Yeast. Add the lukewarm water to a large mixing bowl of a stand mixer. Add the yeast and sugar and mix well. Allow to stand 20 minutes or until volume is doubled in size.1 Cup Lukewarm Water, 1 Tablespoon Active Dry Yeast, ¼ Cup Granulated White Sugar
- Make the Dough. Add flour, salt, softened butter, and egg and mix on low speed with a dough hook until all is combined and the dough comes together. The dough will be elastic and slightly sticky. Increase the mixer speed to medium-low and continue to beat the dough for 5 minutes.3 Cups All-Purpose Flour, 1 ½ Teaspoons Salt, 2 Tablespoons Butter, 1 Large Egg
- Let the Dough Rise. Lightly oil a large bowl. Using a silicon spatula, scrape the dough into a ball and place the dough in the prepared bowl. Turn the dough over, so all sides are lightly covered with oil. Cover the bowl with cling wrap, a large shower cap, or a clean damp towel, and allow the dough to rise until it is 4 times in size, about 2 hours.1 Tablespoon Vegetable Oil
- Shape the Loaf. Lightly flour your working surface. Tip the risen dough out of the bowl and using your hands pat and flatten the dough into a rectangle. Shape the loaf, by tightly rolling the dough into a log from the short end. Place the dough, seam side down, into a greased 9 x 4" loaf pan.
- Let the Loaf Rise. Allow the loaf to rise for 1 hour or until the loaf has doubled in size and risen above the top of the pan. During this last rising, preheat the oven to 350°F.
- Bake the Bread. Bake the bread for 30 to 35 minutes or until lightly golden brown.
- Cool. Remove the bread from the oven and let it cool in the pan on a wire rack. When thoroughly cooled, remove the bread from the pan. Wrap the loaf in cling wrap to keep fresh. Slice as needed and enjoy!
Video
Notes
Nutrition
Per 1 serving. All nutritional information on this site is an estimate. Your results may vary.
Encharted Cook™ or Jan Nunes shall not be liable for adverse reactions or any other outcome resulting from the use of recipes or recommendations on this website or actions you take as a result.
© 2018-2026 Encharted Cook, Jan Nunes. All rights reserved.
![]()

Robert Getty says
Can you double this? So I can make 2 loafs at a time ??
Jan Nunes says
Hi Robert! Thank you for your question!
I have never doubled this recipe, but I can't think of any reason why you couldn't. I do think that the rising time for dough may take a little longer and if you bake both loaves at the same time you will need to rotate the pans during baking.
Have a wonderful day! ~Jan 😊
Robert Getty says
Jan thanks for getting back to me so quickly , I’ll definitely give it a try, my 10yrs old grandson is an eating machine !! So one loaf won’t last long !!
Jan Nunes says
I totally get it!.... Also, if doubling works out for you and you want to make one loaf of bread and a pan of dinner rolls, my Steakhouse Dinner Rolls is the same dough recipe. You just shape the dough into rolls and brush them with honey butter and a sprinkling of flaked sea salt.
Have a wonderful day! ~Jan 😊
Kat says
Hi! I've made this bread twice now - so good - but it seems each time my dough is comes together, it's very soupy and I end up adding an additional 1/2-1 cup of flour and kneading by hand.
I notice in the photos you show melted butter, but in the recipe, it says "softened," could this be why my dough doesn't form how it should?
Thank you!
Jan Nunes says
Hi Kat, Thank you for your comment and questions.
I'm so sorry for the confusion regarding softened butter and melted butter. They are actually interchangeable in this recipe, but you must first measure the butter and then let it come to room temperature to soften it or melt it in the microwave and let it cool. I should make this clearer and will update the recipe to state this.
I'm not sure why your dough is "soupy" and requires so much extra flour. Let's see if we can troubleshoot this issue. The overall hydration for this recipe calls for 1 cup of water to 3 cups of all-purpose flour, which should make a sticky dough. But not a soupy dough. Even with the addition of the 1 large egg and the butter, I've never had to add a large amount of additional flour. Is it possible that you are proofing the yeast in 1 cup of warm water and then adding another cup of water? This would account for a "soupy" batter, instead of a sticky dough.
Have a wonderful day... ~Jan
Shari says
Someone tell me what I’m doing wrong!!! I tried making this twice today, both times my yeast didn’t do anything, I followed the instructions exactly and it just remained liquid! I was so excited to make this recipe, but was so disappointed when it flopped!!! I need HELP!
Jan Nunes says
Hi Shari, I'm so sorry you are having trouble with proofing the yeast and I'm happy to help you with this. Let's troubleshoot this together step-by-step.
First, check the date of the yeast. Jars of yeast generally have a date on the top of the jar that is the "good to use by" date. If the jar is out of date you will need a new, fresh jar that is not expired. I use the Fleischmann's brand which is very reliable. It doesn't matter if it is "bread machine" or "quick rise", either type will work fine.
If you are using packets of dry yeast you will need more than one, since my recipe calls for 1 tablespoon of dry yeast. The packets also have "good to use by" date.
Next, yeast is very temperature sensitive, so the water for proofing must not exceed 115°F. This is warm, not hot water. Hot water will kill the yeast and you will just have liquid. If you don't have a kitchen thermometer to test the temperature of the water, run tap water until it is warm and then let the warm tap water run over your wrist. It should feel warm, not hot.
Add the warm water to a glass bowl, then add the yeast. Lastly, add the sugar and give it a stir. Let the bowl sit for 20 minutes in a warm, but not hot place. Usually, just letting sit uncovered on the kitchen counter is just fine. At the end of 20 minutes, your yeast should be activated and look like the picture I posted. It looks foamy and puffs up. There may be some liquid in the bottom of the bowl and this is okay.
Please let me know how this works for you... I am glad to help!
Shari says
I’m using packets 1 packet was 1 tablespoon, not expired bought new, my water was lukewarm, but I used my metal mixing bowl from my mixer, which I thought is what it called for? I tried twice, I’ll try again tomorrow
Jan Nunes says
Hi Shari! Thanks for your question. 1 packet of yeast is 2 1/4 teaspoons. So, if you follow my recipe exactly you will need 2 packets to have enough for 1 tablespoon. It is okay to use the bowl of your stand mixer, which is what I generally do.
If you use only one packet of yeast you will have to let the yeast proof for a longer period of time. The risings may take longer also. Let me know how it goes tomorrow! I'll be happy to help!
Shari says
Can I use a mixer to mix the yeast well?? I just used a spoon.
Jan Nunes says
Hi Shari! I don't use the mixer to mix the yeast. For me it's very easy to just use a spoon since it is just a quick stir. I find if I use the dough hook to mix the yeast, it is in the way when I want to add the rest of the ingredients. That is what I show in Images #1 and #2. That being said I have a bowl lift mixer where the head does not tilt up. Please do let me know how it goes tomorrow I am happy to help you and I want you to succeed!
Nyssa Brunke says
I am so thrilled with how this turned out. I’ve tried making my own bread several times before and I’ve never managed to make a loaf that’s the kind we like for sandwiches, but this is just perfect. Big, soft, tender and so delicious. Thank you so much for sharing!
Jan Nunes says
Hi Nyssa, I'm so glad this recipe worked so well for you! This is my favorite bread recipe for the exact reasons you said. Sometimes, I just have a slice without anything else on it as a mid afternoon snack. 😉
Karen says
I sooooo love this recipe. Thank you. On my first attempt, I added a heaping tbsp of basil, garlic and oil mix (I used the Classico Pesto) to the egg and added about an extra 1/2 - 1cup of flour to my 1 bread recipe and everyone raved about the taste, texture and how moist it turned.
Jan Nunes says
Hi Karen, I'm so glad you love this recipe!... and I love your idea of adding the pesto sauce. That sounds so delicious!
Annie says
Amazing! Super simple and easy to make with great texture and taste. This is my go to bread recipe from now on for sure!
Jan Nunes says
I'm glad you like this recipe Annie! 🙂
monika says
About to put the risen dough into the oven! Such a nice dough to work with.
How many days (at room temperature) does the bread stay fresh?
It is a good bread to freeze?
Thanks!
<3
Jan Nunes says
Hi Monika! Thank you!... I do like working with this dough too.
The bread will stay fresh for about 10 days at room temperature, if wrapped tightly in cling wrap . I have not tried freezing this particular bread. But, please do let me know if you try to freeze it and how that worked for you. 🙂