

My Homemade Pie Crust contains both butter and shortening to make it tender and flaky. Get my 5 secrets for making the perfect pie crust!
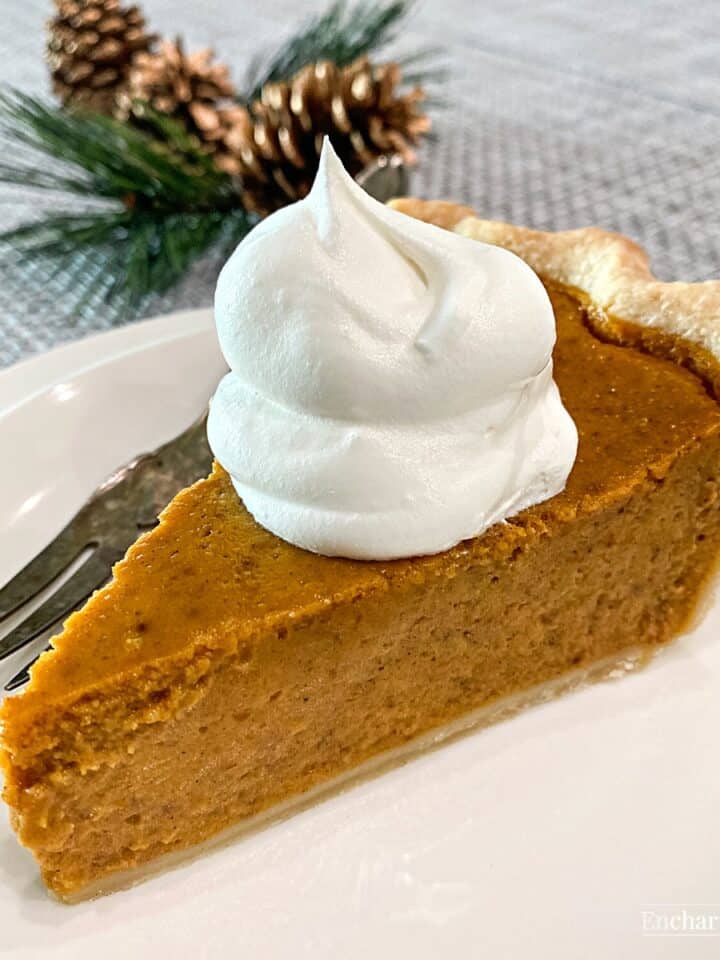
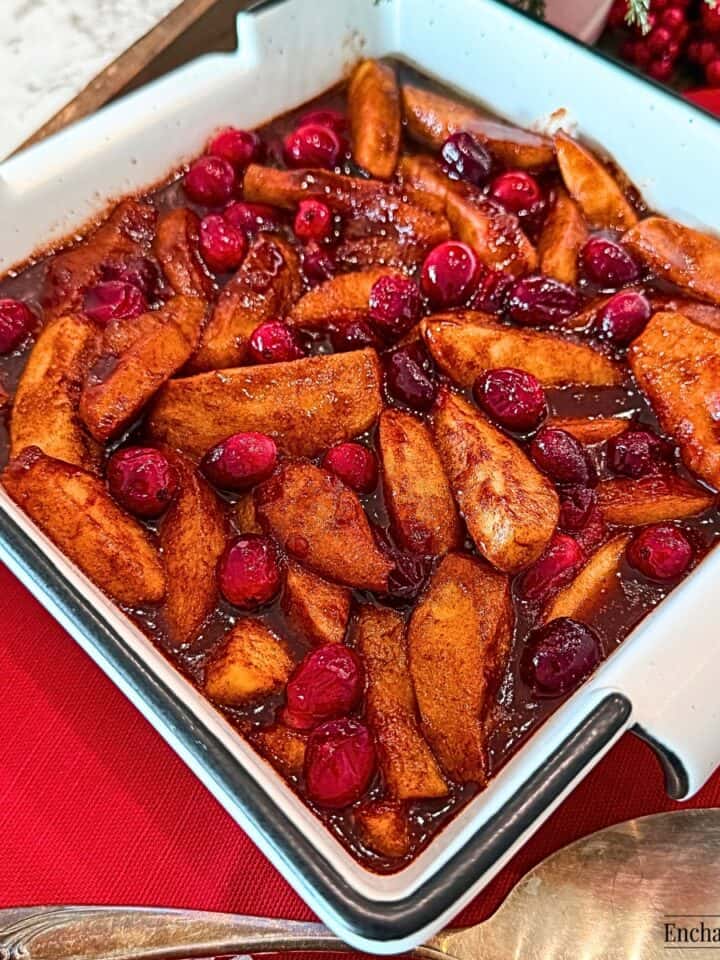
This is my favorite pie crust for making any pie that uses a pastry crus,t like the recipes for my Apple Pie with Sweet Cookie Crust, Cranberry Sugar Pie, and The Famous Pumpkin Pie.
There are many recipes and techniques for making the best homemade pie crust. Some say you must have everything super icy cold. Others state to add ingredients like lemon juice, vinegar, vodka, or even a beaten egg.
So, how do you know what is best and how on earth can you trust any of them?
The answer is that some recipes work for some people. Cooking is like that sometimes. There can be many answers to a question like "how do I make the best?" But I have 5 secrets that can help you make the best pie crust ever.
Jump to:
- Making Pies with My Mom
- How to Make a Tender Flaky Pie Crust
- My Top 5 Secrets to Making the Perfect Homemade Pie Crust
- Ingredient Notes
- How to Make Homemade Pie Crust Dough
- Rolling Out the Pie Crust Dough
- My Top Tips
- Substitutions and Variations
- Make-Ahead & Storage
- More Pies and Pie Crust Recipes You'll Love
- 📖 Recipe
- 💬 Comments
Making Pies with My Mom
Every year, Mom would make pies for the freezer so we could have them for Sunday dinner during the winter. In total, we made around 15 to 20 apple or apricot pies from the fruit of the two trees we had in our backyard. So, yeah, we made a lot of pie crust dough, and I learned a lot during those years about it.
She would meticulously measure all of her ingredients and mix them carefully only to be disappointed. In time she switched to adding hot water to make her crust instead of cold icy water. This meant she used less water and the hot water made a crust that held up well for freezing... and she was masterful at making this crust year in and year out.
It turns out that the hot water made the crust come together more quickly and she used less water... and less water meant not working the dough so much to produce tough gluten.
However, over the years I realized her pie crust recipe required hot water also because the dough was too lean. The ratio of flour to fat was way too low which meant there was not enough fat to cover all of the flour and there was always some flour that was dry after the "cutting in" process.
Eureka! The hot water melted the fat and helped it cover the flour more efficiently. While this made a great crust for freezing, it was not very flaky and tender.
How to Make a Tender Flaky Pie Crust
First, some of the tricks for making pie crust are done to correct a recipe that does not work.
Nothing has to be extra super icy cold, not the fat nor the water. Cold is good enough.
And you don't need to add any extra protein like a beaten egg, acid to soften the dough, or booze to reduce the water in the crust as it bakes.
So for me, I realized all of the "tricks" in many recipes are completely unnecessary.
The second thing I learned, which took years of trial and error, is to make a fattier dough so I don't work so hard cutting the flour and fat together.
I've found the best ratio of flour to fat is 1 ¼ cups of flour to ½ cup of fat.
| Single Crust | 1¼ Cups Flour | ½ Cup Fat |
| Double Crust | 2½ Cups Flour | 1 Cup Fat |
| 3 Crusts | 3¾ Cups Flour | 1½ Cups Fat |
This recipe and the method I use are really simple, and you do not need a food processor or a special knack to make a delicious flaky crust.
Pie crust for me has been something like alchemy. Searching for that perfect flour-to-fat ratio, the perfect water volume, and the bare minimum time to mix the pie dough.
But, it's really not that difficult and I'm going to share the top 5 secrets I've learned over the years to make the perfect pie crust.
My Top 5 Secrets to Making the Perfect Homemade Pie Crust
- Flour to Fat Ratio. The proportion of flour to fat must be 1-¼ cups of flour to ½ cup of shortening, butter, or lard.
- Chill the Ingredients. Measure and refrigerate the butter and shortening before beginning. Cold fat is easier to work into the flour.
- Cut in Well. The fat must be cut into the flour so that no loose flour is in the bowl. In other words, the fat must cover the flour completely. It's okay to work the flour and fat for as long as it takes. The pie crust only gets tough when you work the water in too long.
- Mix Sparingly. When adding the cold water, sprinkle it evenly over the dough. A silicon spatula is the best tool to fold and mix the dough just until it comes together.
- Chill Before Rolling. Chill the pie crust dough for at least 20 minutes before rolling it out.
Seriously, that's all there is to making a perfect flaky pie crust. I know from making pies with my mom for many years that it can be a struggle to get a homemade pie crust right. But with the right recipe and technique, it is so super easy, it seems magical.
So, let's bake!
Ingredient Notes

Here's what you need to make a tender, flaky pie crust:
- All-Purpose Flour - Just use all-purpose flour and don't substitute bread flour, cake flour, or any fancy schmancy flour.
- Salt - Ordinary table salt is good. You know, the one in the round blue container with a little girl with an umbrella on the label.
- Sugar - Just a small amount of sugar softens the flavor of a crust. Don't worry, the amount in the recipe won't make it a sweet crust. But it will taste better with a little sugar added. You can use powdered sugar or white granulated sugar.
- Shortening - I like to use Crisco shortening for half of the fat because it has a higher heat tolerance than butter and lets the crust brown without burning in a high-heat oven. Mixing shortening and butter gives the best qualities of each, higher heat tolerance plus rich flavor.
- Butter - I also like to use butter for its rich flavor. Check out my easy tips on how to measure butter that will save you time.
- Ice Water or Cold Water - The water must be cold to make a great crust. Add a few ice cubes to tap water or use refrigerated water, both work well.
Please see the recipe card for the exact quantities.
How to Make Homemade Pie Crust Dough
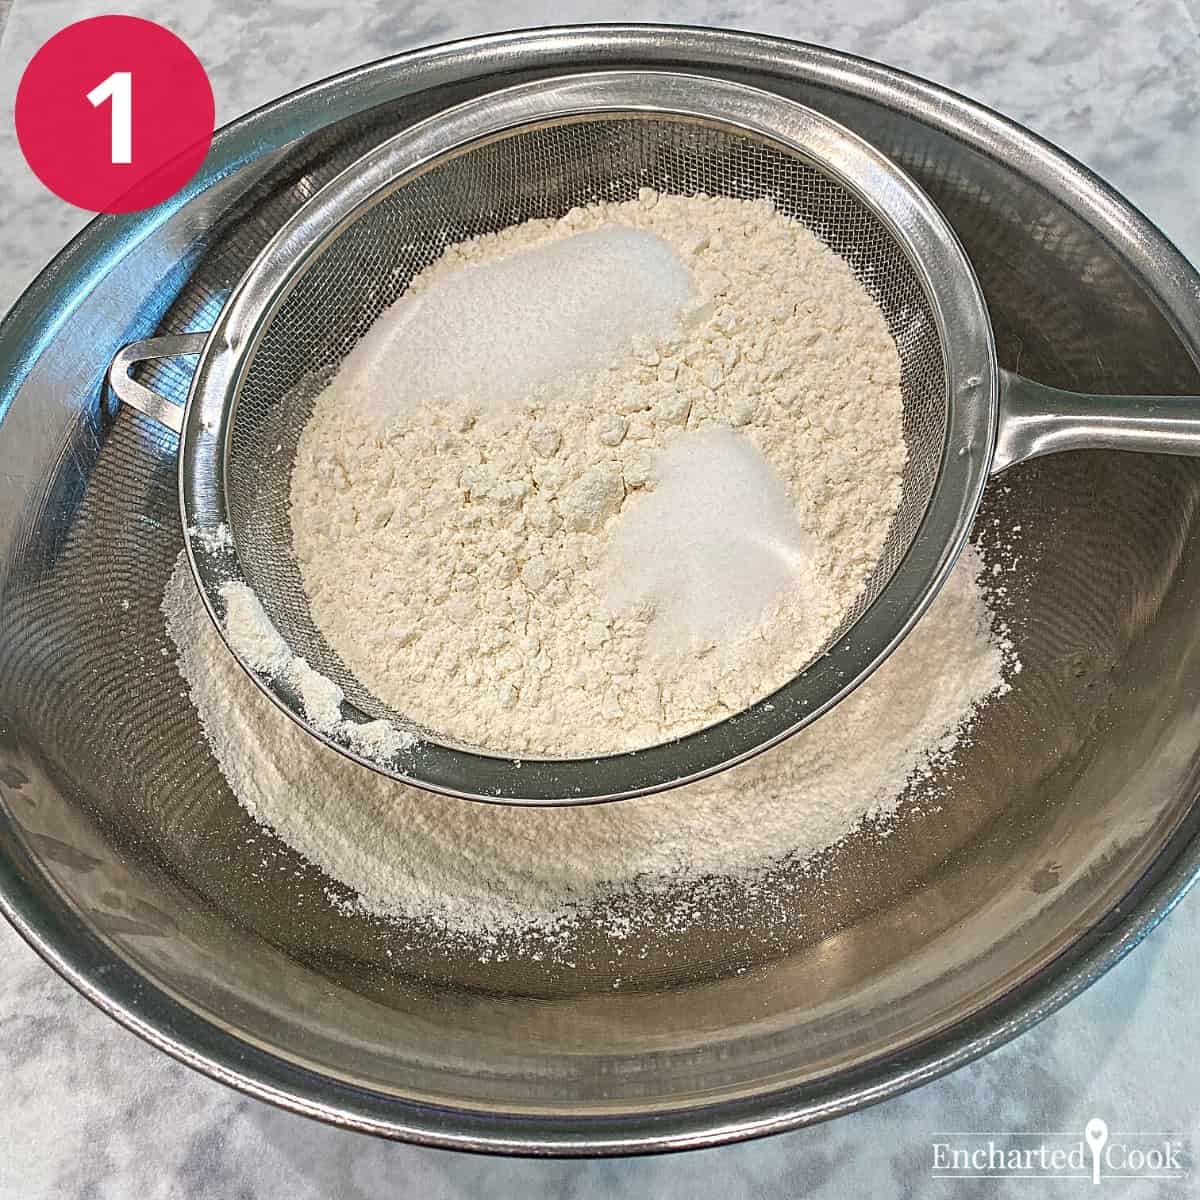
STEP 1 - In a medium-sized bowl sift together the flour, salt, and sugar.
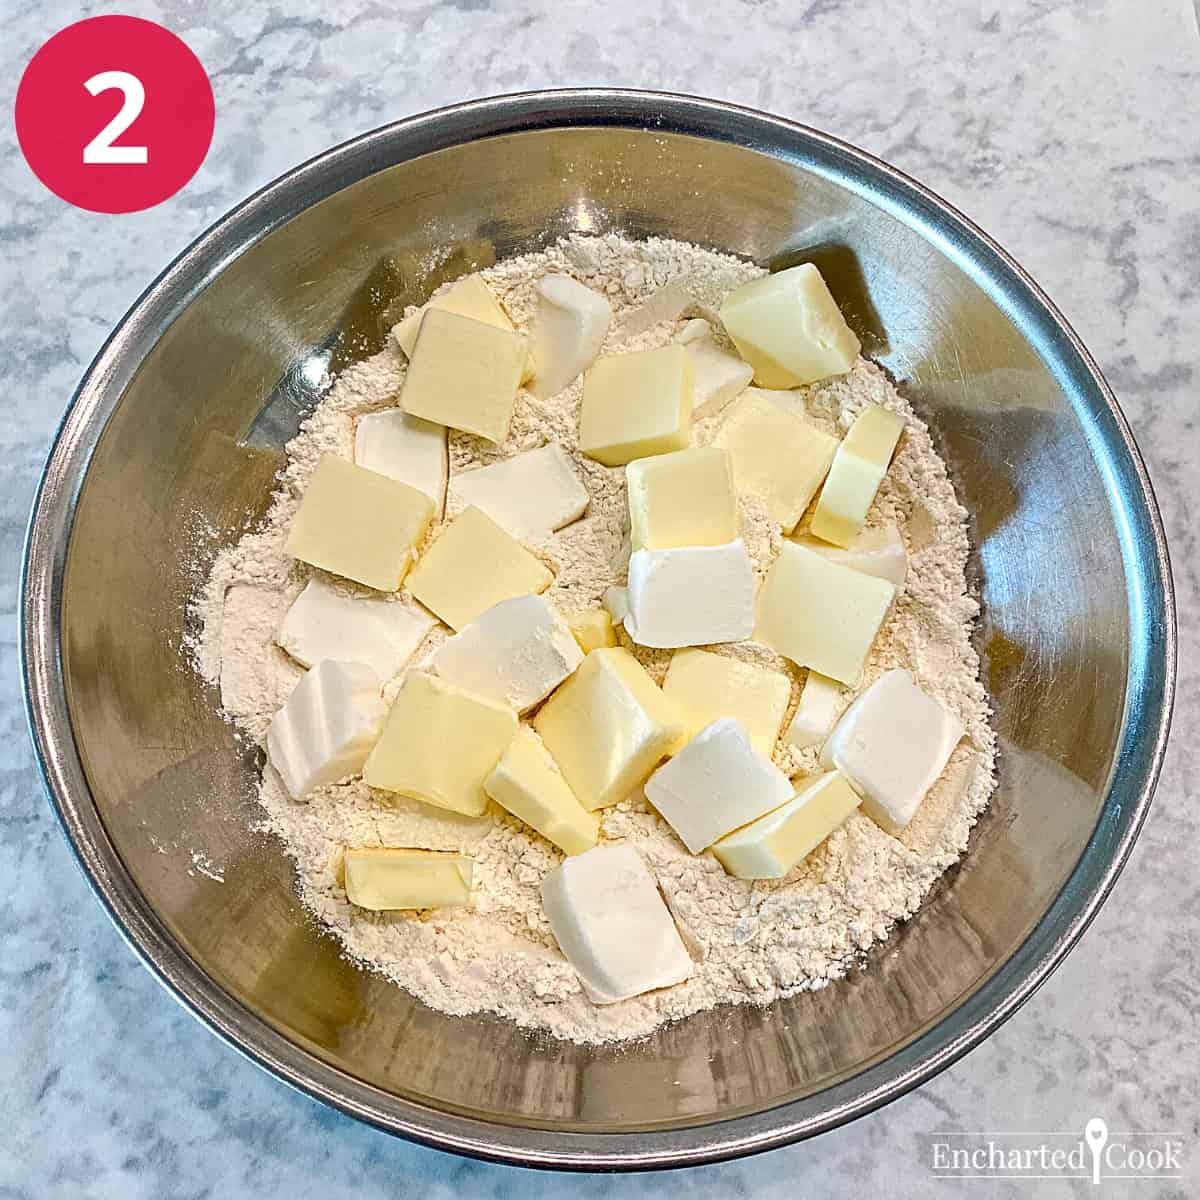
STEP 2 - Slice the cold butter and shortening into ¼" pieces and add them to the dry ingredients.

STEP 3 - Using a pastry cutter, two knives, or a fork, work the shortening and butter into the dry ingredients. The mixture should look like very small peas with coarse sand.

STEP 4 - Sprinkle half of the cold water over the pie crust dough. Use a silicon spatula to fold the dough just until it barely comes together. Sprinkle the remaining water and continue to fold the dough just until it comes together.

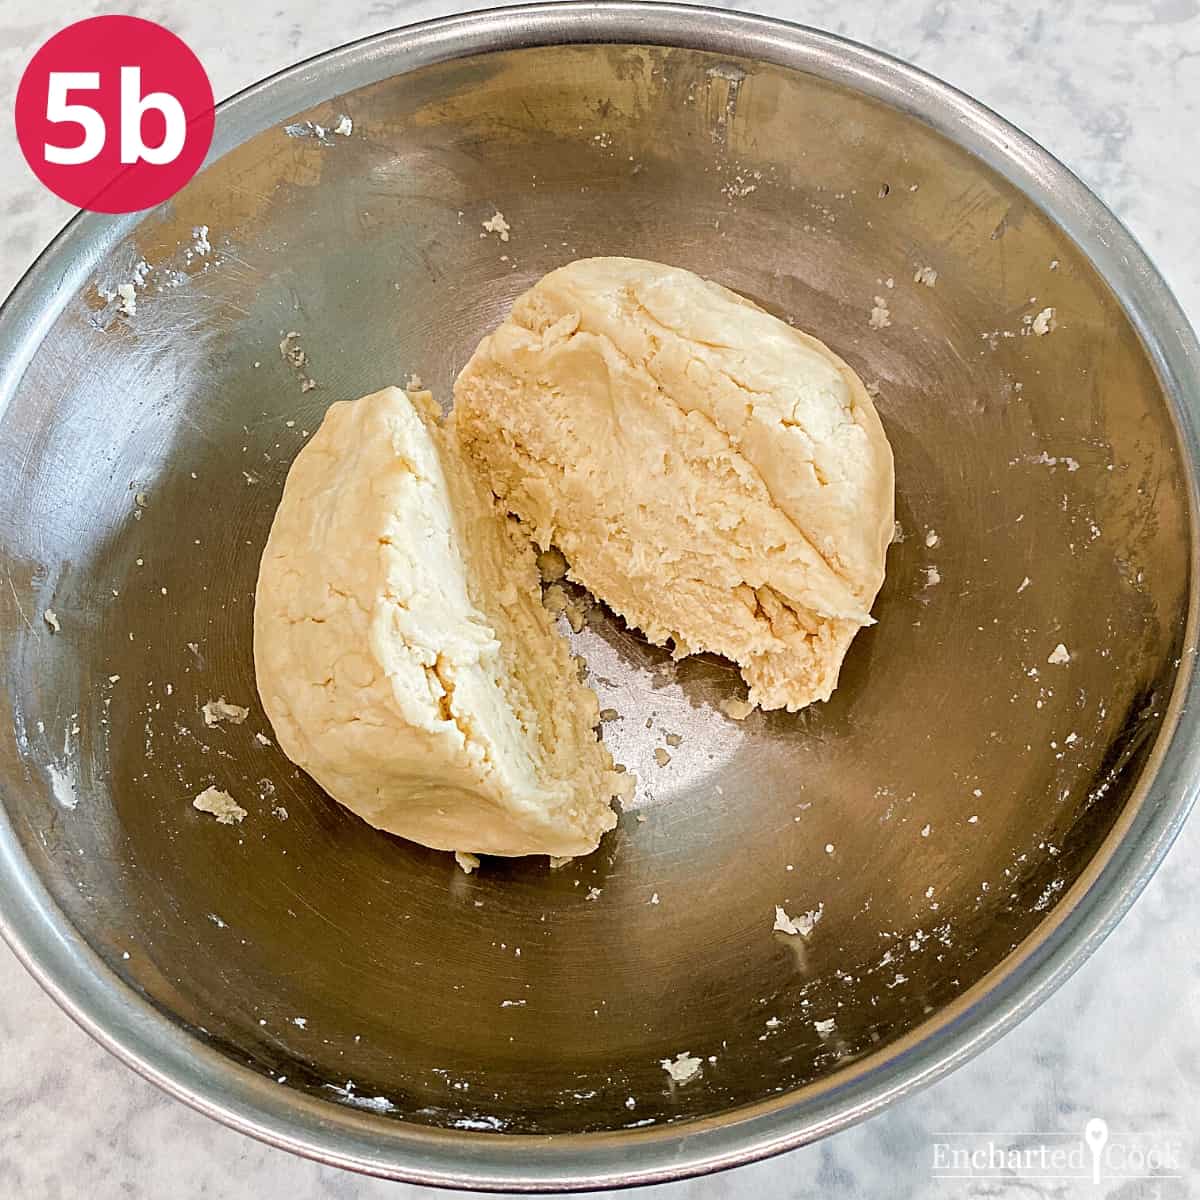
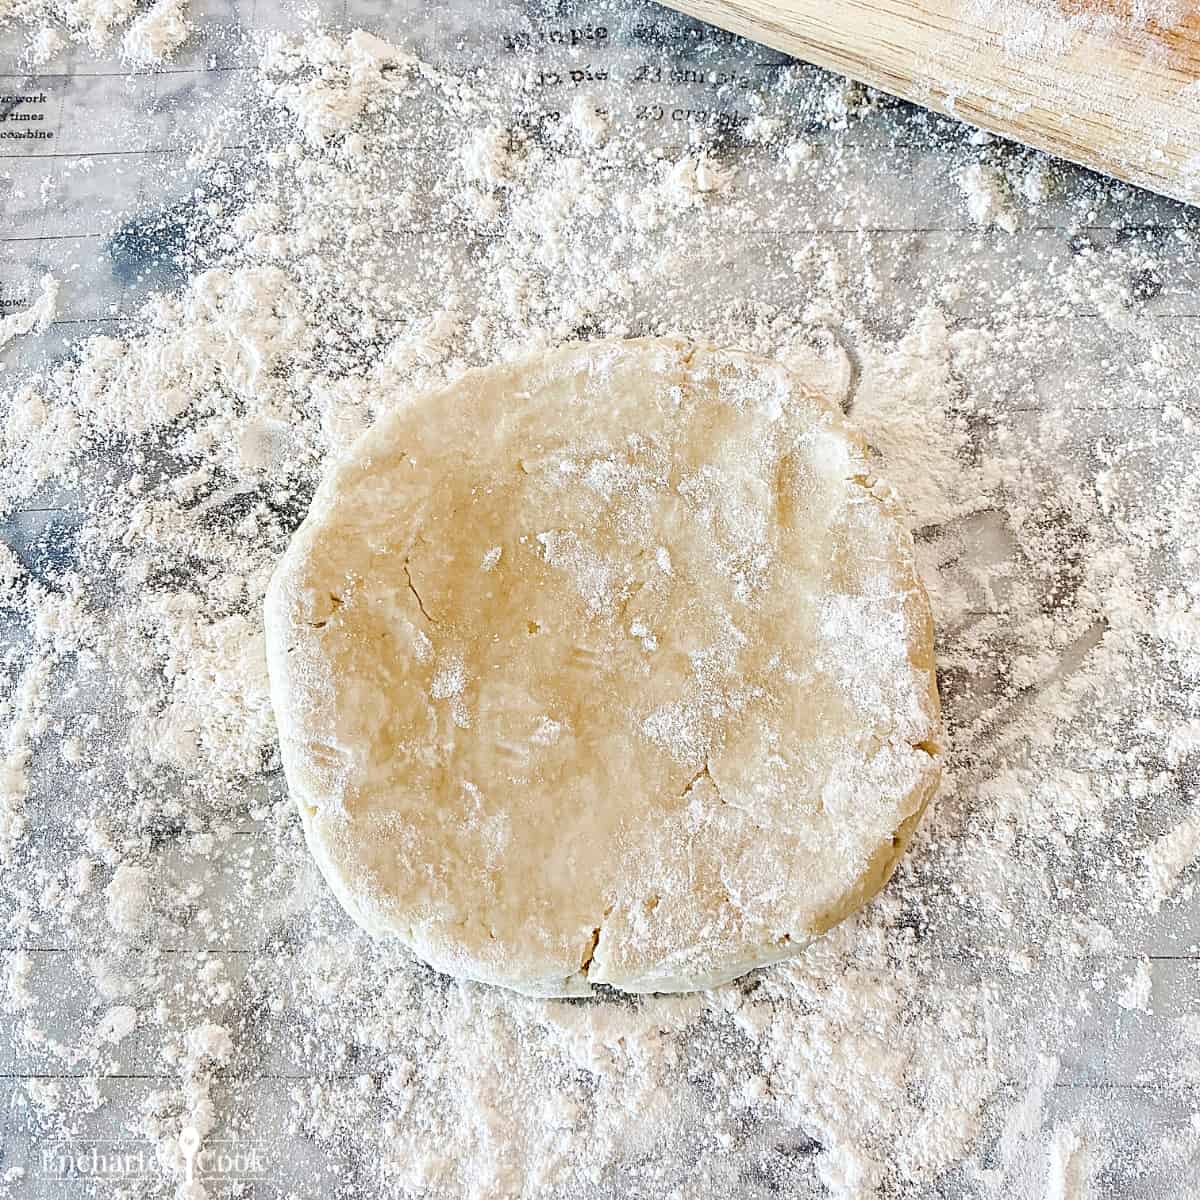
STEP 5 - Gather the homemade pie crust dough into a ball, divide the ball into two halves and flatten each half into a disk.

STEP 6 - Wrap each disk in cling wrap and refrigerate them for at least 20 minutes before rolling and shaping. Chilled dough is easier to handle and also gives time for the dough to relax.
Rolling Out the Pie Crust Dough
If you have stored your pie crust dough in the refrigerator for longer than 20 minutes it will need to warm slightly for you to be able to roll it out. So, remove the pie crust dough from the refrigerator at least 20 minutes prior to rolling it out.
Sprinkle a work surface with flour. Place a disk of pie crust dough in the center of the work surface. With your fingers and the heel of your hand pat the dough out to prepare it for the rolling pin. Toss a small amount of flour beneath the disk to prevent it from sticking.

Roll the dough from the center out. Check often to ensure the dough is not sticking by lifting and rotating the dough. This is key. Lift the dough, throw some flour beneath it, and rotate the dough ¼ turn.
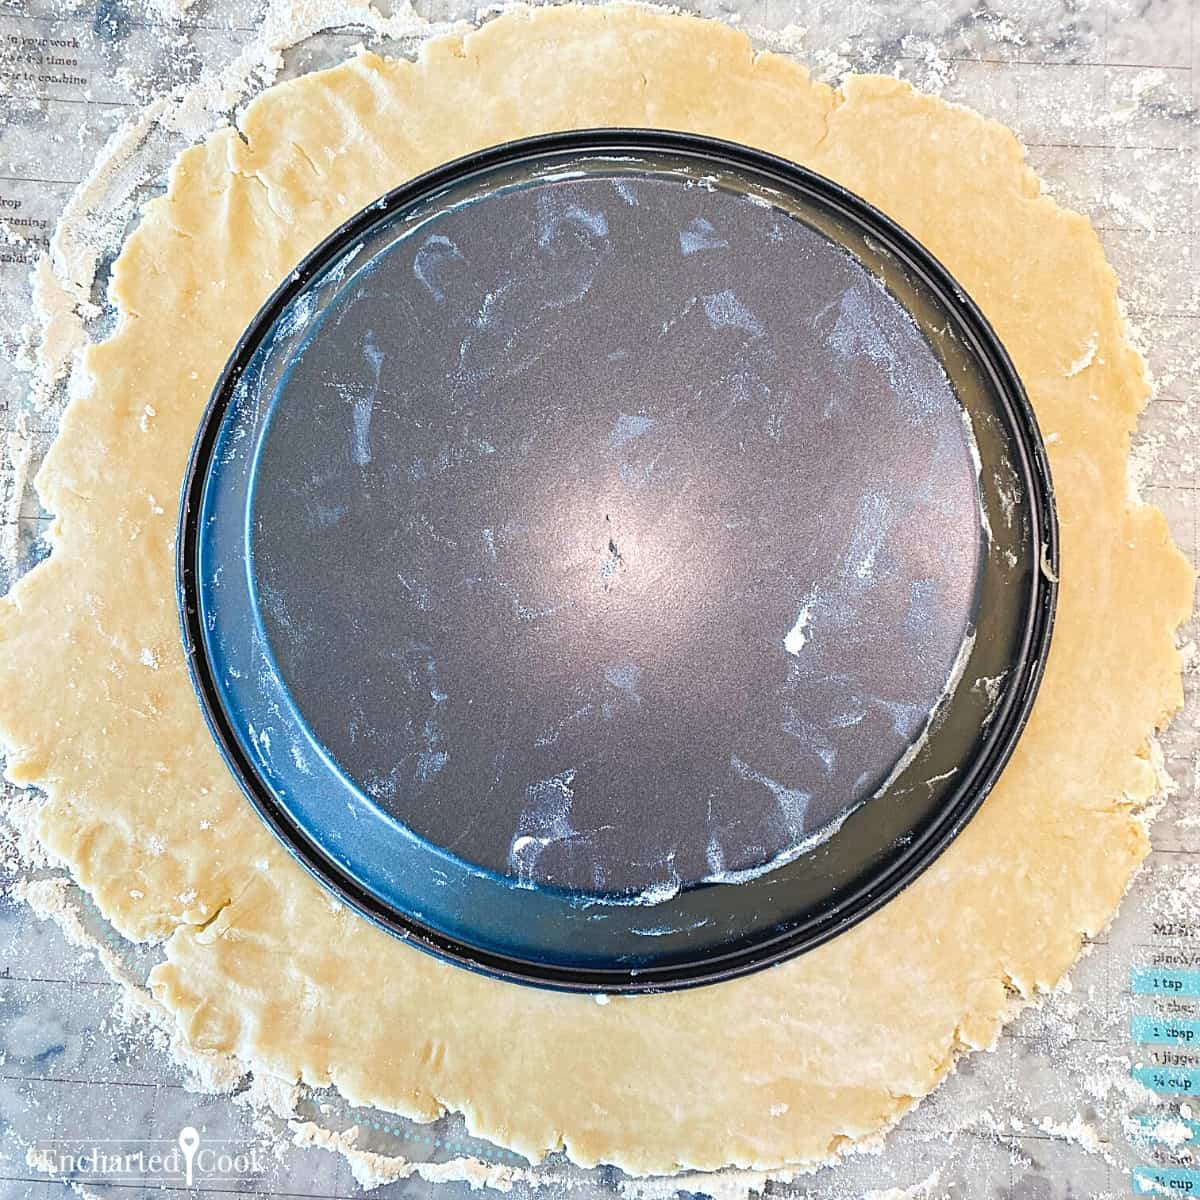
Roll the dough at least 2" larger than your pie pan. Place an upside-down pie pan on the dough to check for size.

Roll the dough onto the rolling pin to transfer it to the pan and gently ease the dough into the pan.
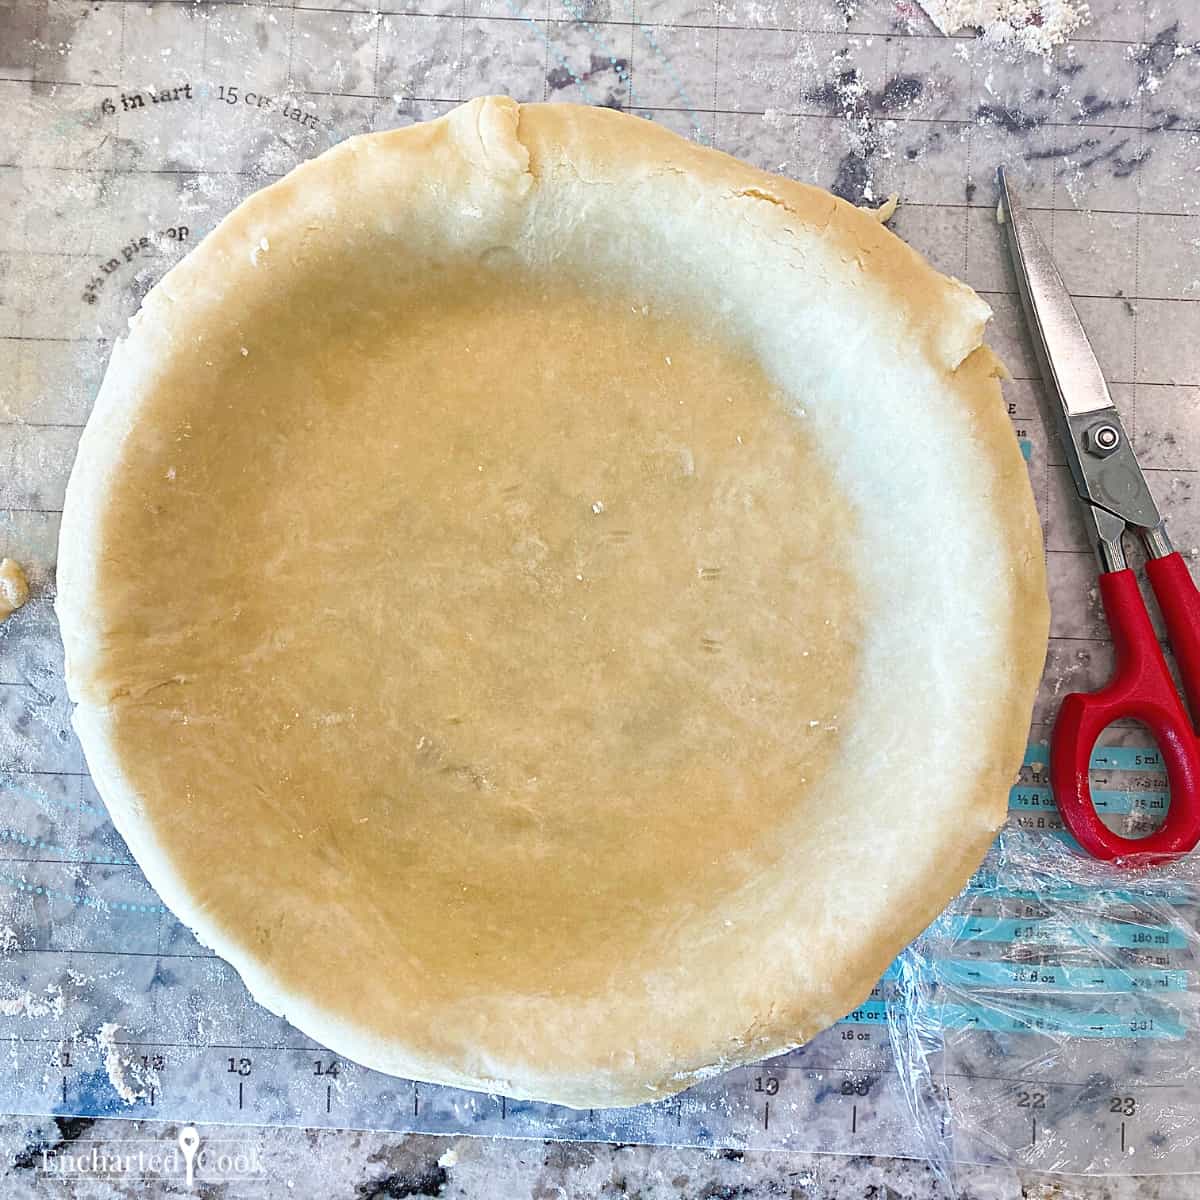
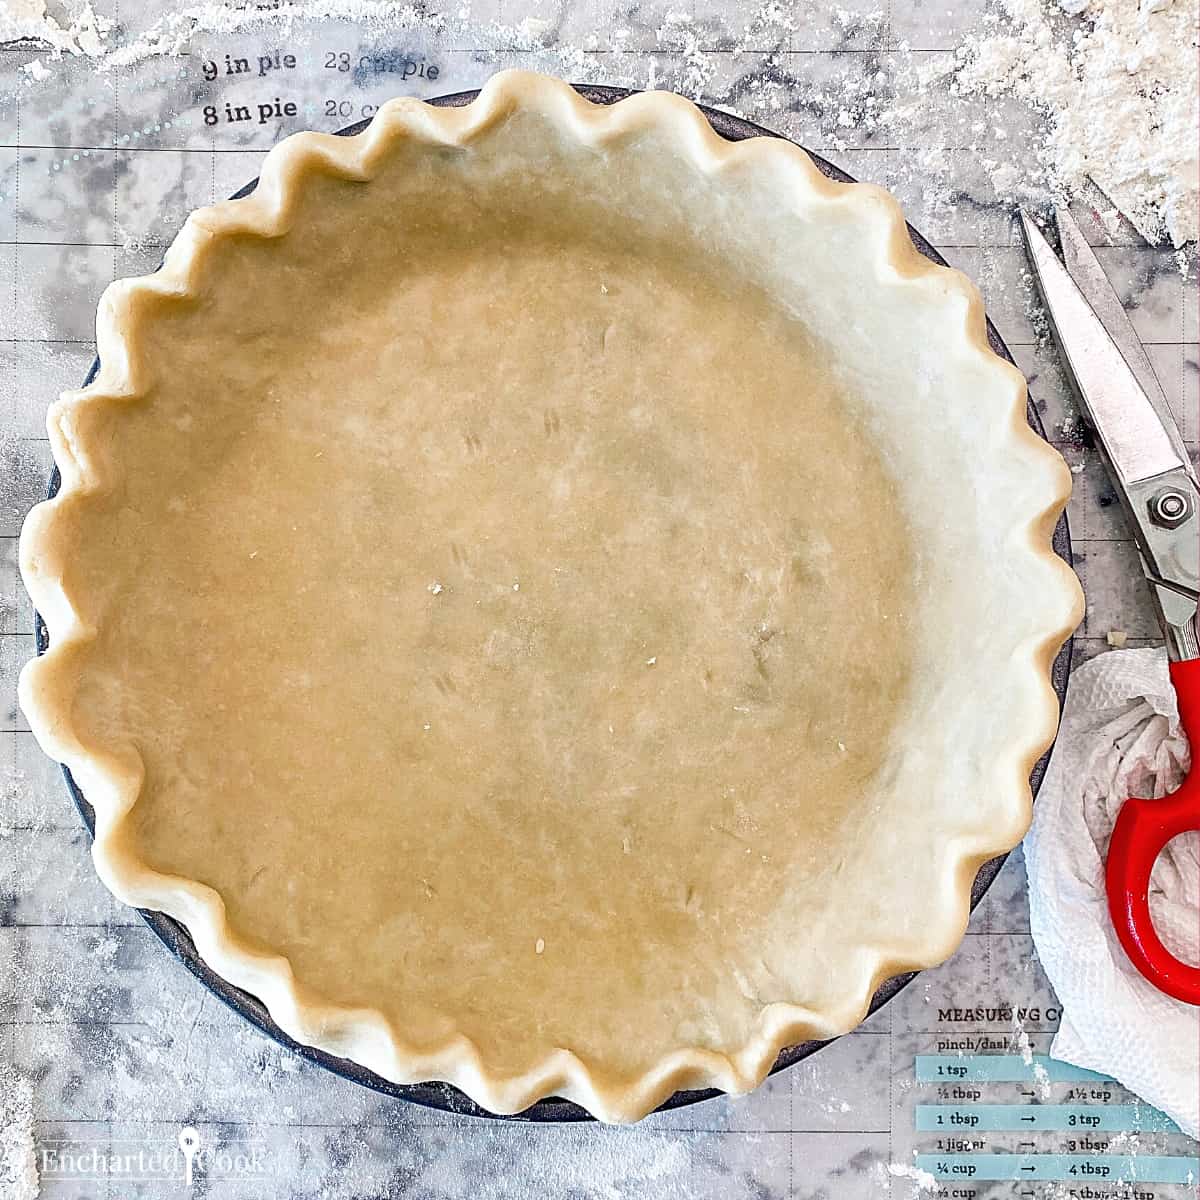
Trim any excess dough from the edge of the pan.
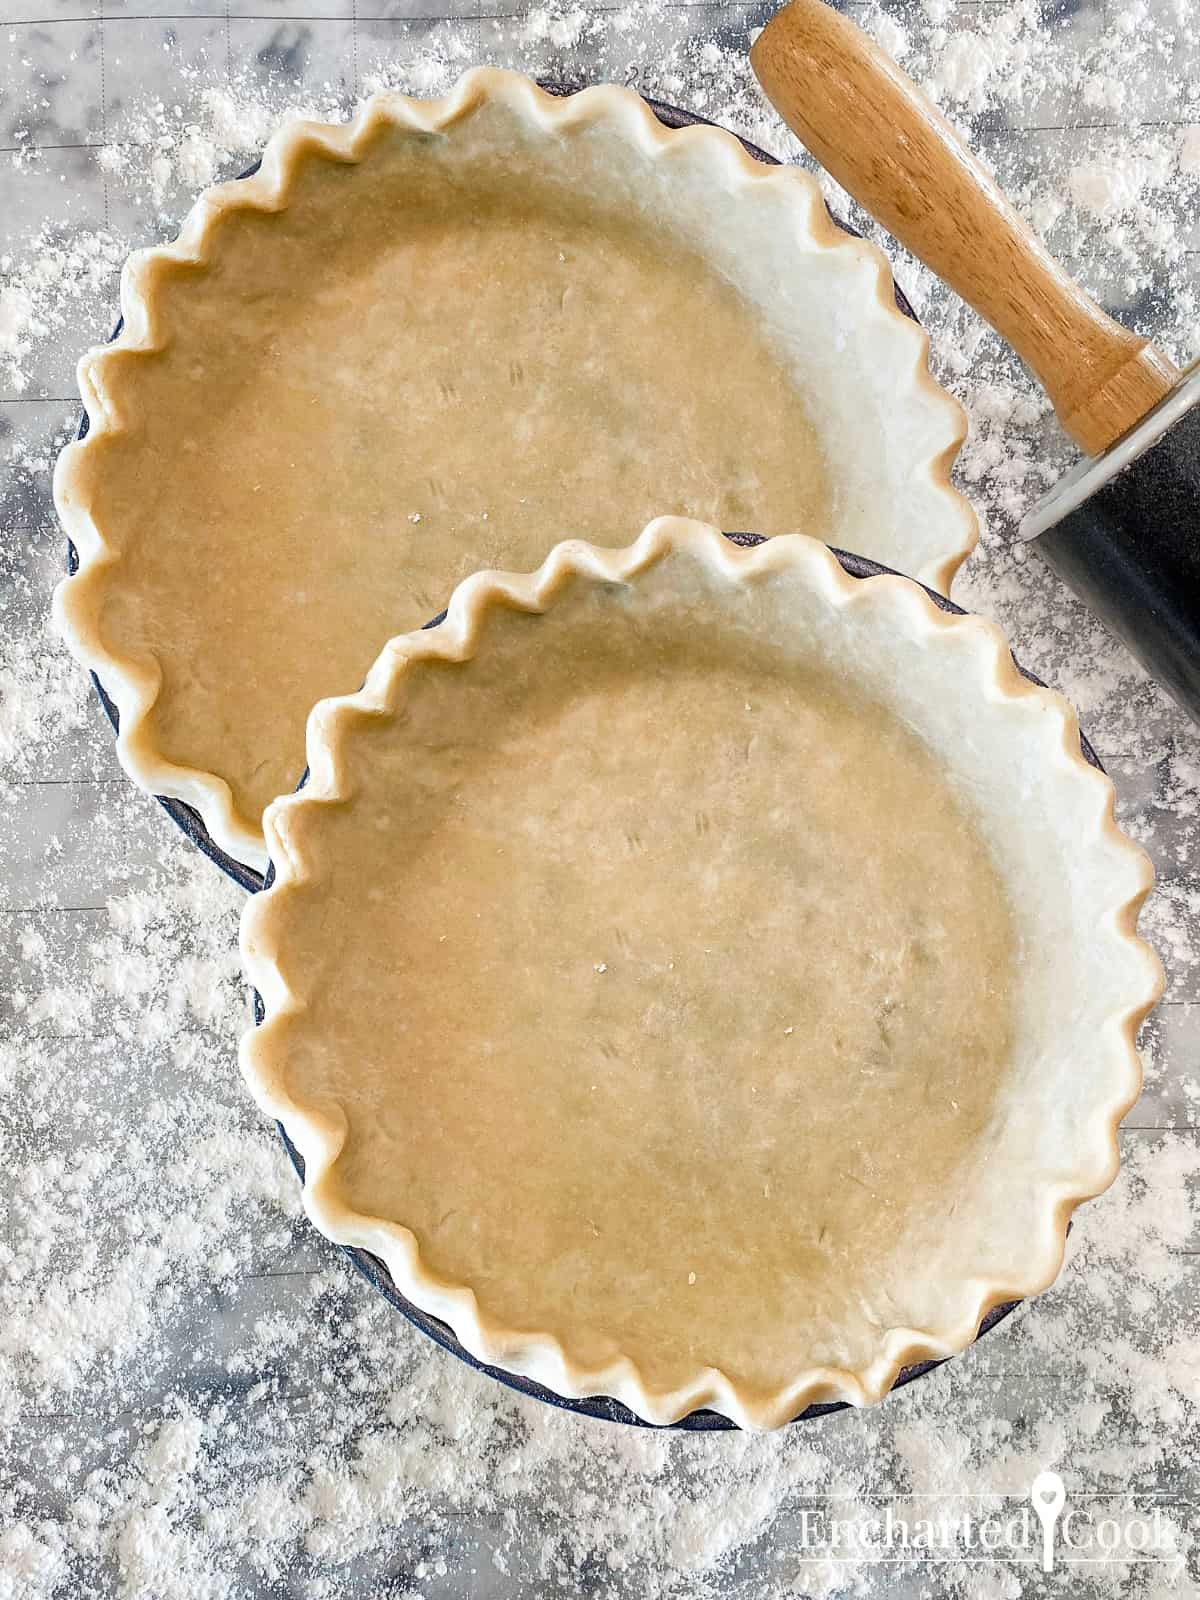
Fold the cut edge under the edge of the dough to create a thicker edge. Crimp or flute as desired. The pie crust is now ready to be filled and the pie baked.
My Top Tips
Making the Pie Crust Dough
♡ Measure and refrigerate the shortening before using. I generally allow 2 hours to chill it.
♡ Don't add the water 1 tablespoon at a time. Many recipes state to do this. But this overworks the pie crust dough and toughens it. Add half the water, fold the dough, and then add the rest of the water.
Rolling Out the Pie Crust
♡ Remove the pie crust dough from the refrigerator for 20 minutes before rolling it out. Overly cold dough is difficult to handle and will take longer to roll out.
♡ The most important thing is not to let the pie crust dough stick to the work surface. Periodically turning the dough as it is rolled, and adding flour as needed, is key to good roll-out.
Substitutions and Variations
There are several substitutions and variations of this Homemade Pie Crust, which is a half-butter and half-shortening crust. This chart shows the recipes for five variations: Basic Economy Crust, Hot Water Crust, Full Butter Crust, Cooking Oil Crust, and Sweet Cookie Crust. Each of these recipes has a simple substitution for the fat type, and each recipe makes two crusts.

Additionally, each pie crust variation on this chart follows the same ratio of flour to fat except for the cooking oil and the sweet cookie crust versions. Also listed are the methods for mixing the dough, baked texture, and baked color.
Make-Ahead & Storage
- Make-Ahead: You can make pie dough ahead of time and store it in the refrigerator or freezer.
- Refrigerator: To store the pie crust dough in the refrigerator, wrap it in plastic wrap. It can be stored in the refrigerator for up to a week.
- Freezer: To freeze, wrap the pie crust in plastic wrap and place it in a sealed plastic bag. You can store it in the freezer for up to a month. If you have a FoodSaver vacuum sealer, you can freeze pie crust for up to 6 months.
More Pies and Pie Crust Recipes You'll Love


xxx
♡ Did you love this Homemade Pie Crust? Please leave a star rating and a comment below!
📖 Recipe

Homemade Pie Crust Plus 5 Variations
Want to save this recipe?
Ingredients
Instructions
- In a medium-sized bowl sift together the flour, salt, and powdered sugar.2 ½ Cups All-Purpose Flour, 1 Teaspoon Salt, 1 Tablespoon Powdered Sugar
- Slice the cold butter and shortening into ¼" pieces and add them to the dry ingredients.½ Cup Shortening, ½ Cup Butter
- Using a pastry cutter, two knives, or a fork, work the shortening and butter into the dry ingredients. The mixture should look like very small peas with coarse sand.
- Sprinkle half of the cold water over the pie crust dough. Use a silicon spatula to fold the dough just until it barely comes together. Sprinkle the remaining water and continue to fold the dough just until it comes together.6 Tablespoons Ice Water or Very Cold Water
- Gather the pie crust dough into a ball, divide the ball into two halves and flatten each half into a disk.
- Wrap each disk in cling wrap and refrigerate them for at least 20 minutes before rolling and shaping.
Notes
-
- ½ Cup Butter
- ¾ Cup Sugar
- 1 Large Egg, Slightly Beaten
- 1 Teaspoon Vanilla
- 2 Tablespoons Heavy Cream
- 2 ½ Cups Flour
- 1 Teaspoon Salt
Nutrition
Per 1 serving. All nutritional information on this site is an estimate. Your results may vary.
Encharted Cook™ or Jan Nunes shall not be liable for adverse reactions or any other outcome resulting from the use of recipes or recommendations on this website or actions you take as a result.
© 2018-2026 Encharted Cook, Jan Nunes. All rights reserved.
![]()
Rasha says
Hello
The recipes looks great..
Im new to baking, in this recipe you use shortening, i dont know if i have it at my place (dont know what to look for), is there anything that i can replace it with? if so, the same amount?
Thank you in advance
Rasha
Jan Nunes says
Hi Rasha,
Thank you for your question! Crisco is the brand of shortening I use and I will update the recipe to state that. It is an all-vegetable shortening that is a wonderful product that is useful in many dishes. Grocery stores generally stock Crisco in either the baking aisle or with the cooking oils.
If you can't find Crisco, there is also a crust made with only butter you could try, or you can use only oil. Crusts made with only oil or only butter are darker in color when they bake. In my opinion I would only make an oil crust if I had no other choice. I have a recipe chart with both of these methods listed in it and will update the post to include this chart.
Lastly, you could substitute lard. I have never tried this, but before Crisco was invented, good cooks used lard to make pie crust. So, simply swap lard for the Crisco.
I hope this helps... and please let me know how it goes!
Have a Wonderful Day! ~Jan